
For years Github has been the de facto place to host repositories and share code. Github Actions revolutionised CI/CD, freeing users from archaic systems like Jenkins, and making it more accessible to developers without a background in system administration. You can even host docker images on their container registry.
But what if you could have all these features within the control of your homelab? A self-hosted alternative to Github, with support for Actions and Container Registries. Allow me to introduce you to Gitea.
In this series I will walk you through the setup and configuration of Gitea, Gitea Actions and its container registry. By the end, you will have a small project that uses Gitea to host its code, run actions to check for code quality, and build a container to push to the container registry.
Prerequisites
- Database - Either MySQL, MariaDB or PostgreSQL with a database and user created for the Gitea instance.
- (Optional) SMTP mailbox for Gitea to send email notifications and password resets from.
- (Highly recommended) DNS to point domains to your Gitea instance.
- (Highly recommended) Reverse proxy configured with SSL.
Setting Up Gitea
Gitea can be installed in a variety of ways for different environments, found here. I will be installing my instance in Unraid, which uses a pre-configured docker container.
Installing Gitea in Unraid
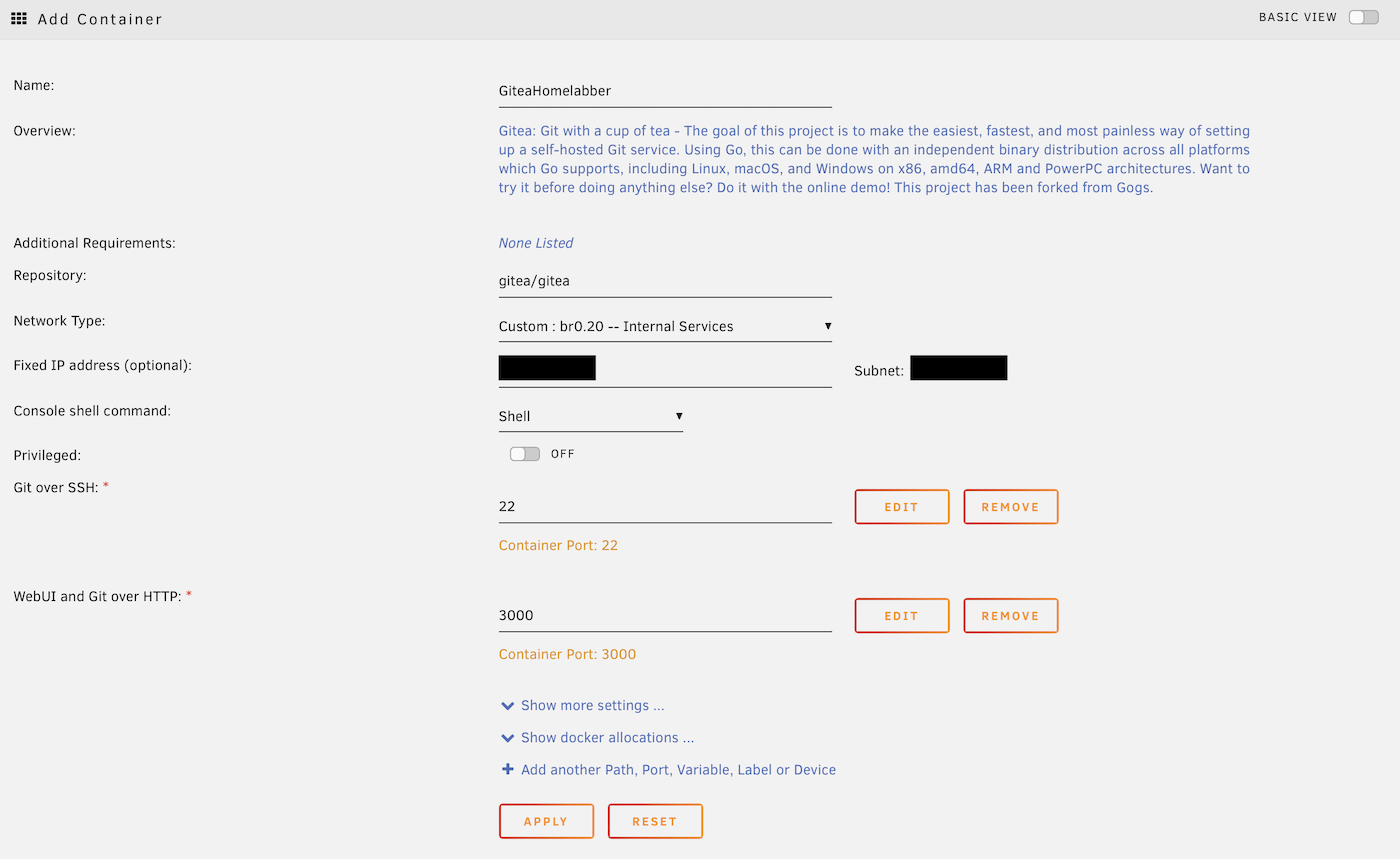
Unless your instance has a dedicated IP address (for example using ipvlan), you will probably need to change the SSH port
from 22 to something else like 222 as your host is likely already using that port for SSH.
Once the instance has started, go to the configured address http://YOUR_IP:3000 in your browser where you will see the Gitea setup page. Go ahead and update the various fields with your own configuration.
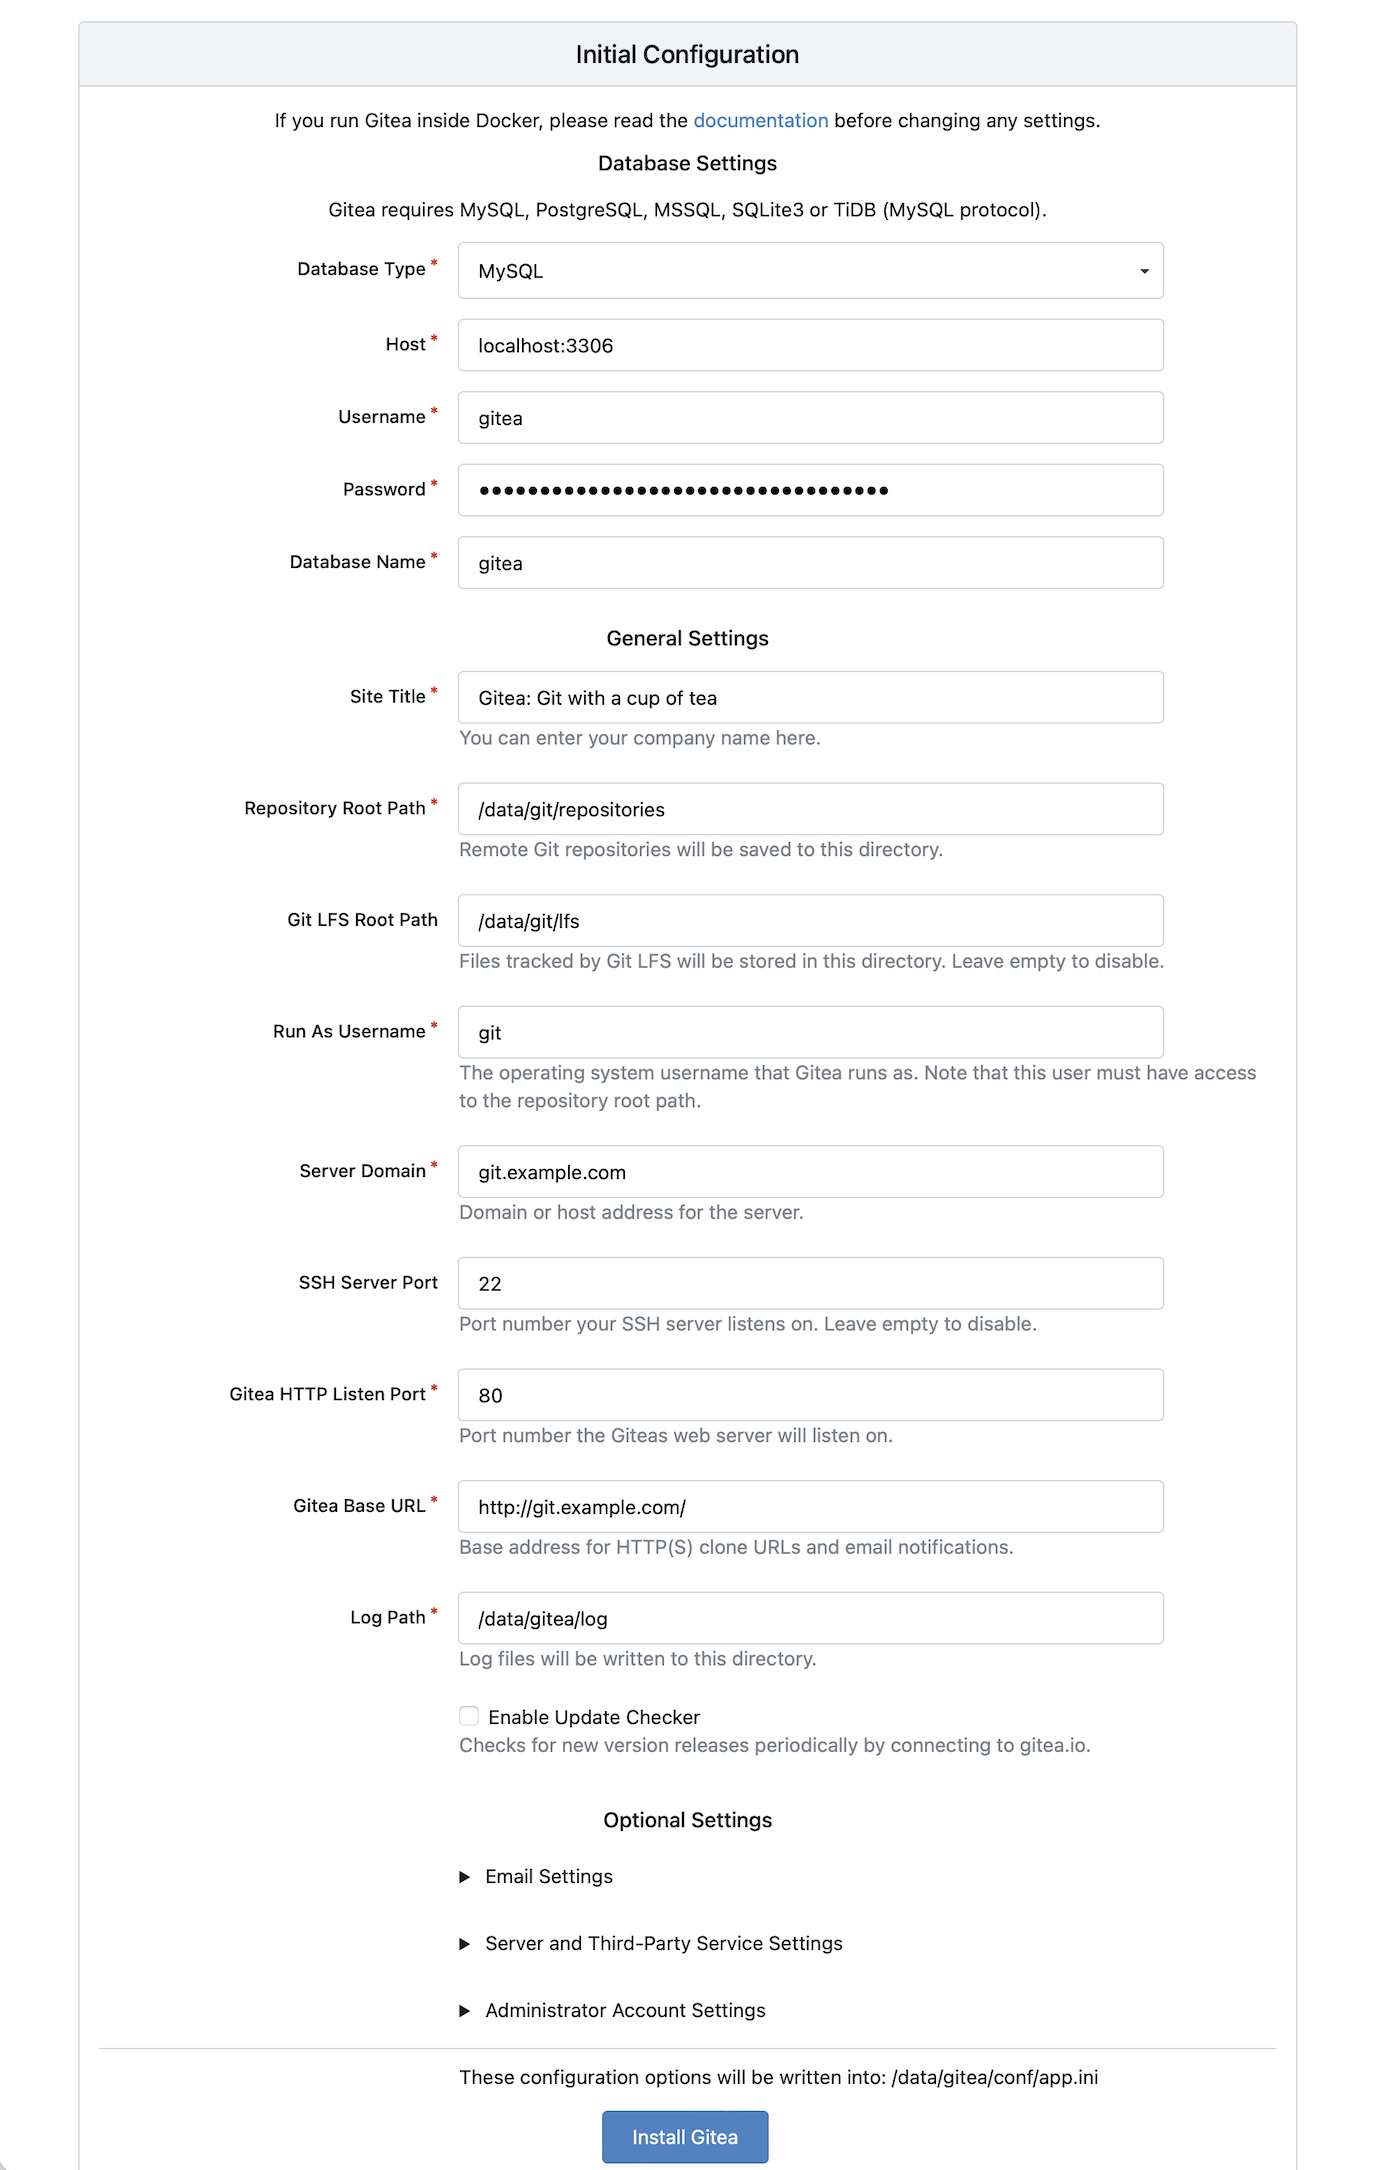
Fields of note:
- Database fields.
- Server Domain - This will be used throughout Gitea.
- SSH Port - Change this to match the port you assigned the container.
- Gitea HTTP Listen Port - Change this to match the port you assigned to the container.
- Gitea Base URL - Change this to match your Server Domain (or IP address if you’re not using a domain), making sure to retain the
http://and trailing/.
You may want to set up an SMTP mailbox to send emails like notifications and password resets, although this is not required.
I encourage you to take a look at the “Server and Third-Party Settings” section and tailor it to your preferences.
Finally, create an administrator account and click the “Install Gitea Button”.
If you have set a domain name, go ahead and navigate to it in your browser, after a minute or so the Gitea instance should be ready!
Further Gitea Configuration
If you ever need to change the configuration for Gitea in the future, for example, to enable a feature, allow a domain or
change the email settings, you can do so by editing the config file from the running directory, gitea/conf/app.ini.
SSH On Another Port
If your Gitea instance is not using port 22 for SSH, you will need to pass through SSH from the host to the Gitea instance. Gitea has documented a number of methods to achieve this here. You will want to have a read through these options and choose the one that best fits your configuration and environment.
Reverse Proxy and SSH
Most reverse proxies need to be configured to proxy SSH. If like me, you are using Nginx Proxy Manager, this is not currently possible.
A workaround for this is to use a different domain for your SSH connections to Gitea.
In your DNS of choice, add a new recording pointing the SSH domain (I prefixed my domain with the “ssh” subdomain) to the Gitea instance.
A ssh.git.example.com 192.168.1.10
Next you will need to update SSH_DOMAIN in the Gitea config found from the running directory, gitea/conf/app.ini:
(note the provided example is just a subsection of the full app.ini file)
[server]
APP_DATA_PATH = /data/gitea
DOMAIN = git.example.com
SSH_DOMAIN = ssh.git.example.com
HTTP_PORT = 80
ROOT_URL = http://git.example.com/
DISABLE_SSH = false
SSH_PORT = 22
Restart the Gitea instance and the changes will be applied. To test this, go ahead and add your SSH key to your Gitea account by clicking your profile in the top right of the site and going to “Settings > SSH / GPG Keys”.
Once added, from your terminal run ssh -T git@YOUR_SSH_DOMAIN. You should see something like this:
ssh -T [email protected]
Hi there, thehomelabber! You've successfully authenticated with the key named laptop, but Gitea does not provide shell access.
If this is unexpected, please log in with password and setup Gitea under another user.
If you are still prompted for a password, this means SSH is not properly configured and you will need to debug further. Remember to check if port 22 is already in use on the host machine and that the DNS record is pointing to the correct place.
ssh -T [email protected]
[email protected]'s password:
Adding the Repository
Now you have a working instance, you can start creating repositories!
In part two of this series I will walk you through setting up Gitea Actions using Gitea Runners. If you want to follow along, you will want to set up our example repository.
The irony of using GitHub for this example is not lost on us and we do plan on moving to a self-hosted version of Gitea in the future.
This example is a small Go based web application that simply takes a name from the URL and shows it on the page. Don’t worry, you do not need to know Go, or how to program for that matter. It’s nothing fancy, but perfect to run some automated checks on and eventually build and push a container to our Container registry.
You have two options for setting this up:
- Gitea Migration Tool - Simply use Gitea migration tool to clone the repository into your Gitea instance.
- Clone locally and Push - Create a new repository in your Gitea instance, clone the example repository locally, change the origin and push to your newly created repository.
Option 1 - Gitea Migration Tool
In order to use this tool, you will need to update the Gitea config to allow the Github domain, using the ALLOWED_DOMAINS
option. You can find this config file from the running directory gitea/conf/app.ini.
[migrations]
ALLOWED_DOMAINS = github.com,api.github.com
Restart the instance to apply the changes.
Next, to migrate, click the “+” icon in the top right of Gitea and select the “New Migration” option. From here you can choose to migrate from a variety of Git providers. Select Github.
You will want to provide the URL to migrate / clone: https://github.com/TheHomelabber/self-hosted-git-hello-world,
the rest of the fields can remain unchanged.
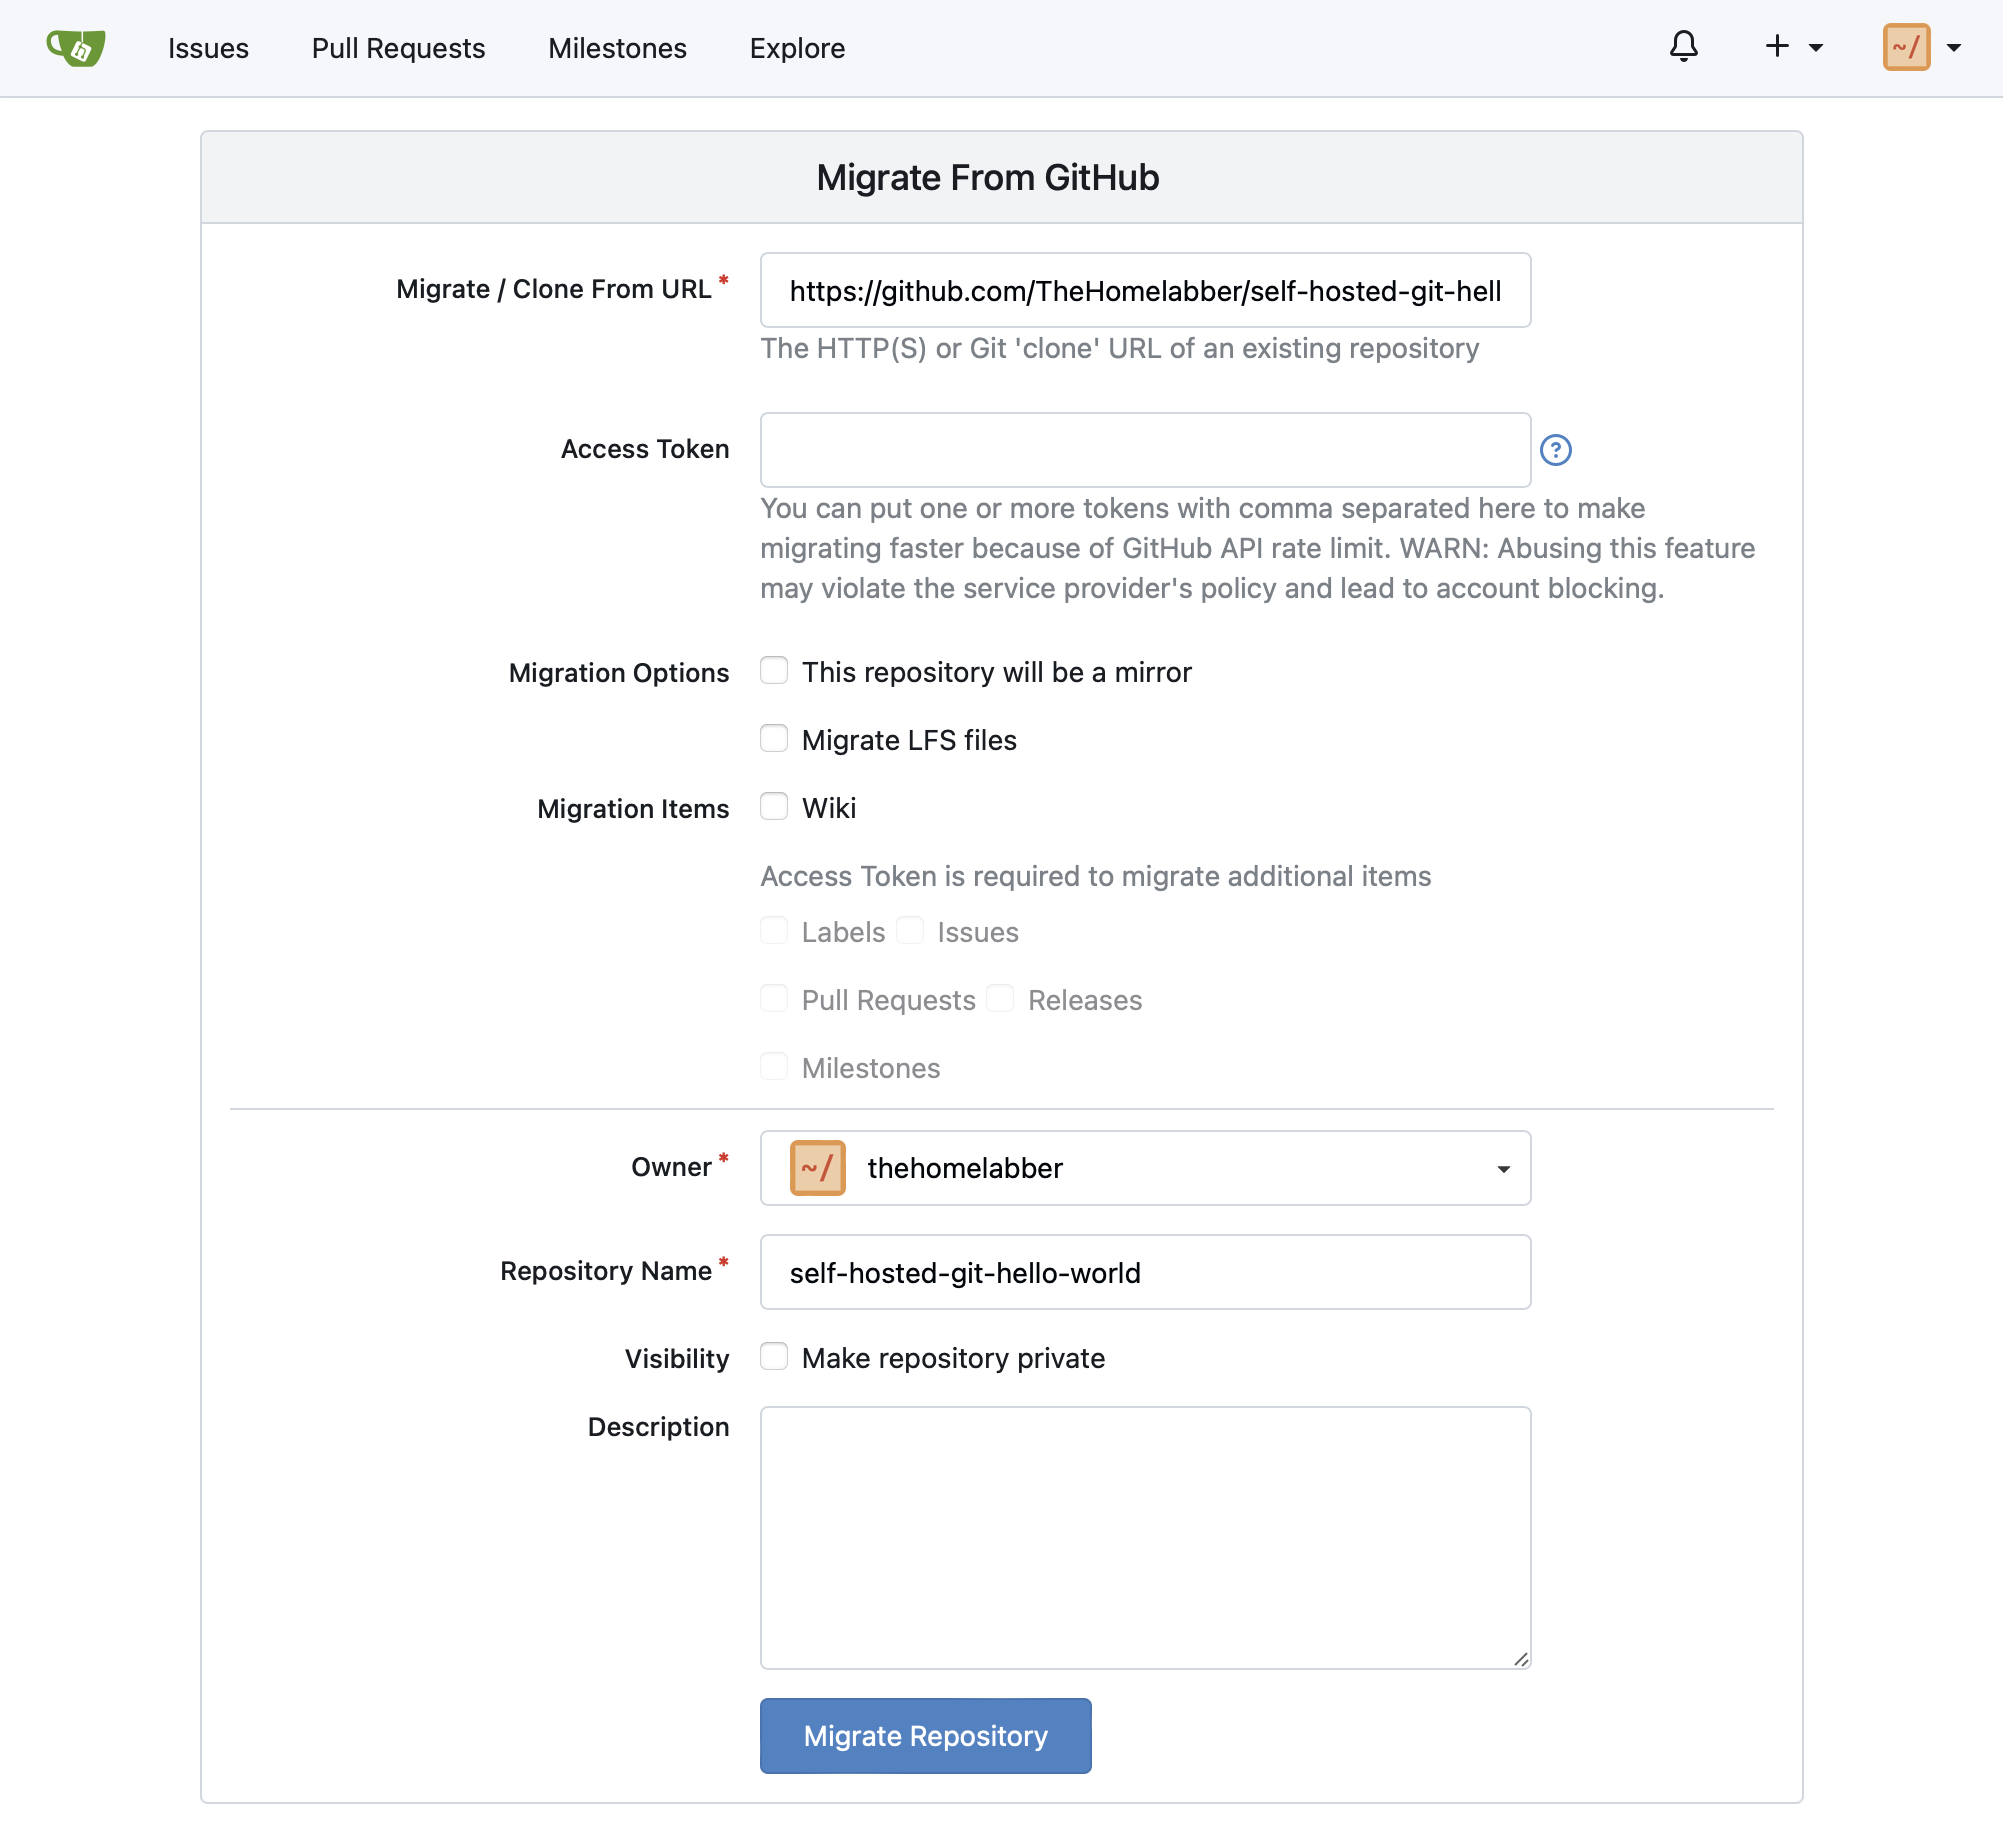
Click the “Migrate Repository button”, you should see a progress bar and then the newly migrated repository.
Finally, clone the repository locally ready for part two:
# Replace the clone url with your instance
git clone [email protected]:thehomelabber/self-hosted-git-hello-world.git
Option 2 - Clone locally and Push
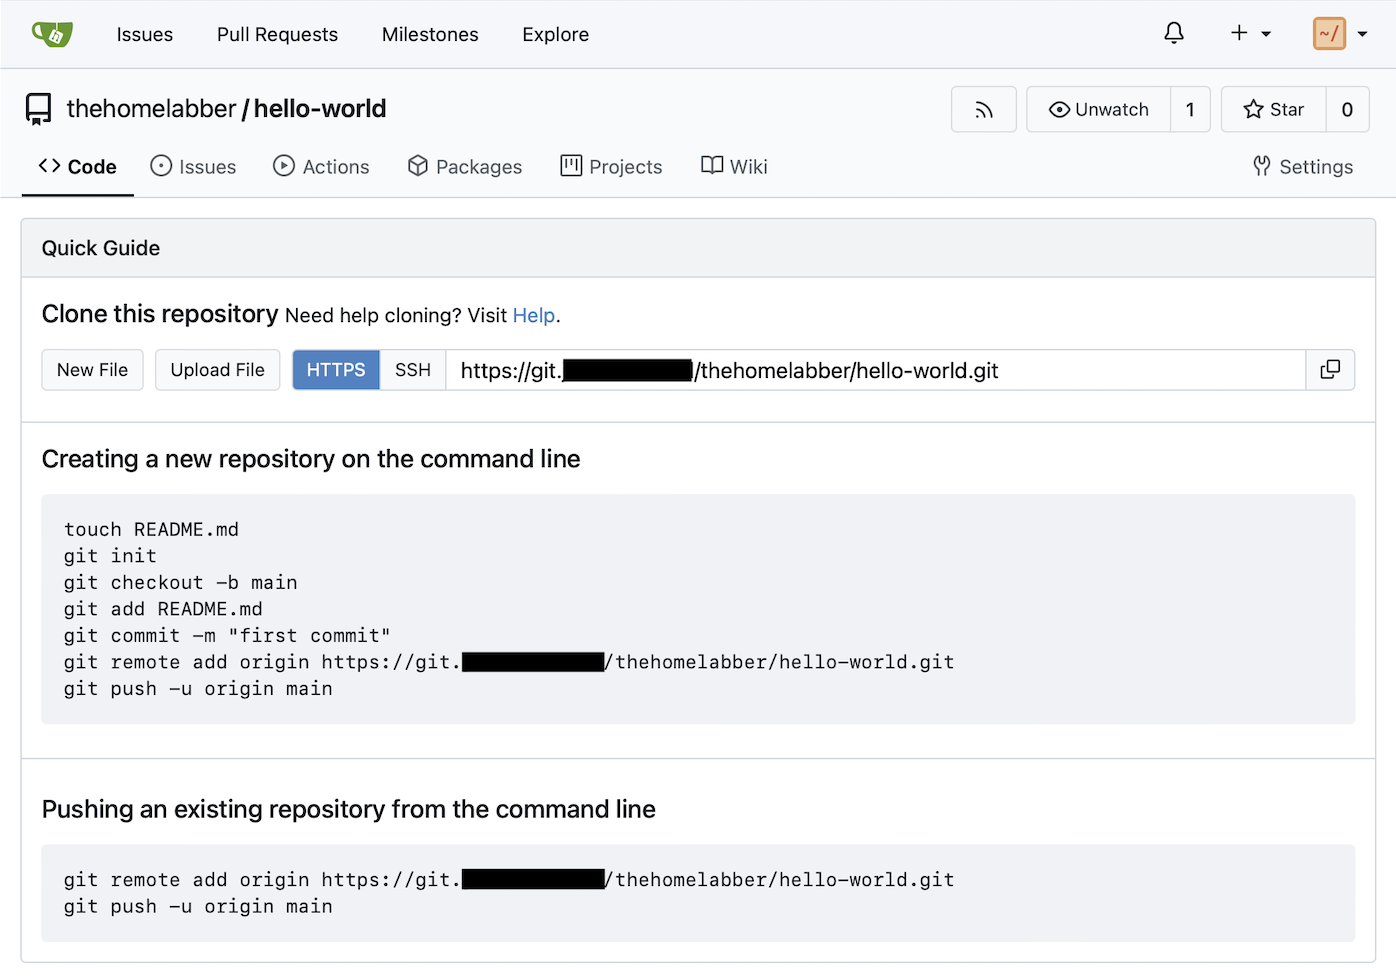
First create the new repository in your Gitea instance by clicking the “+” icon in the top right of Gitea, and select the “New Repository” option. I used “hello-world” in this example:
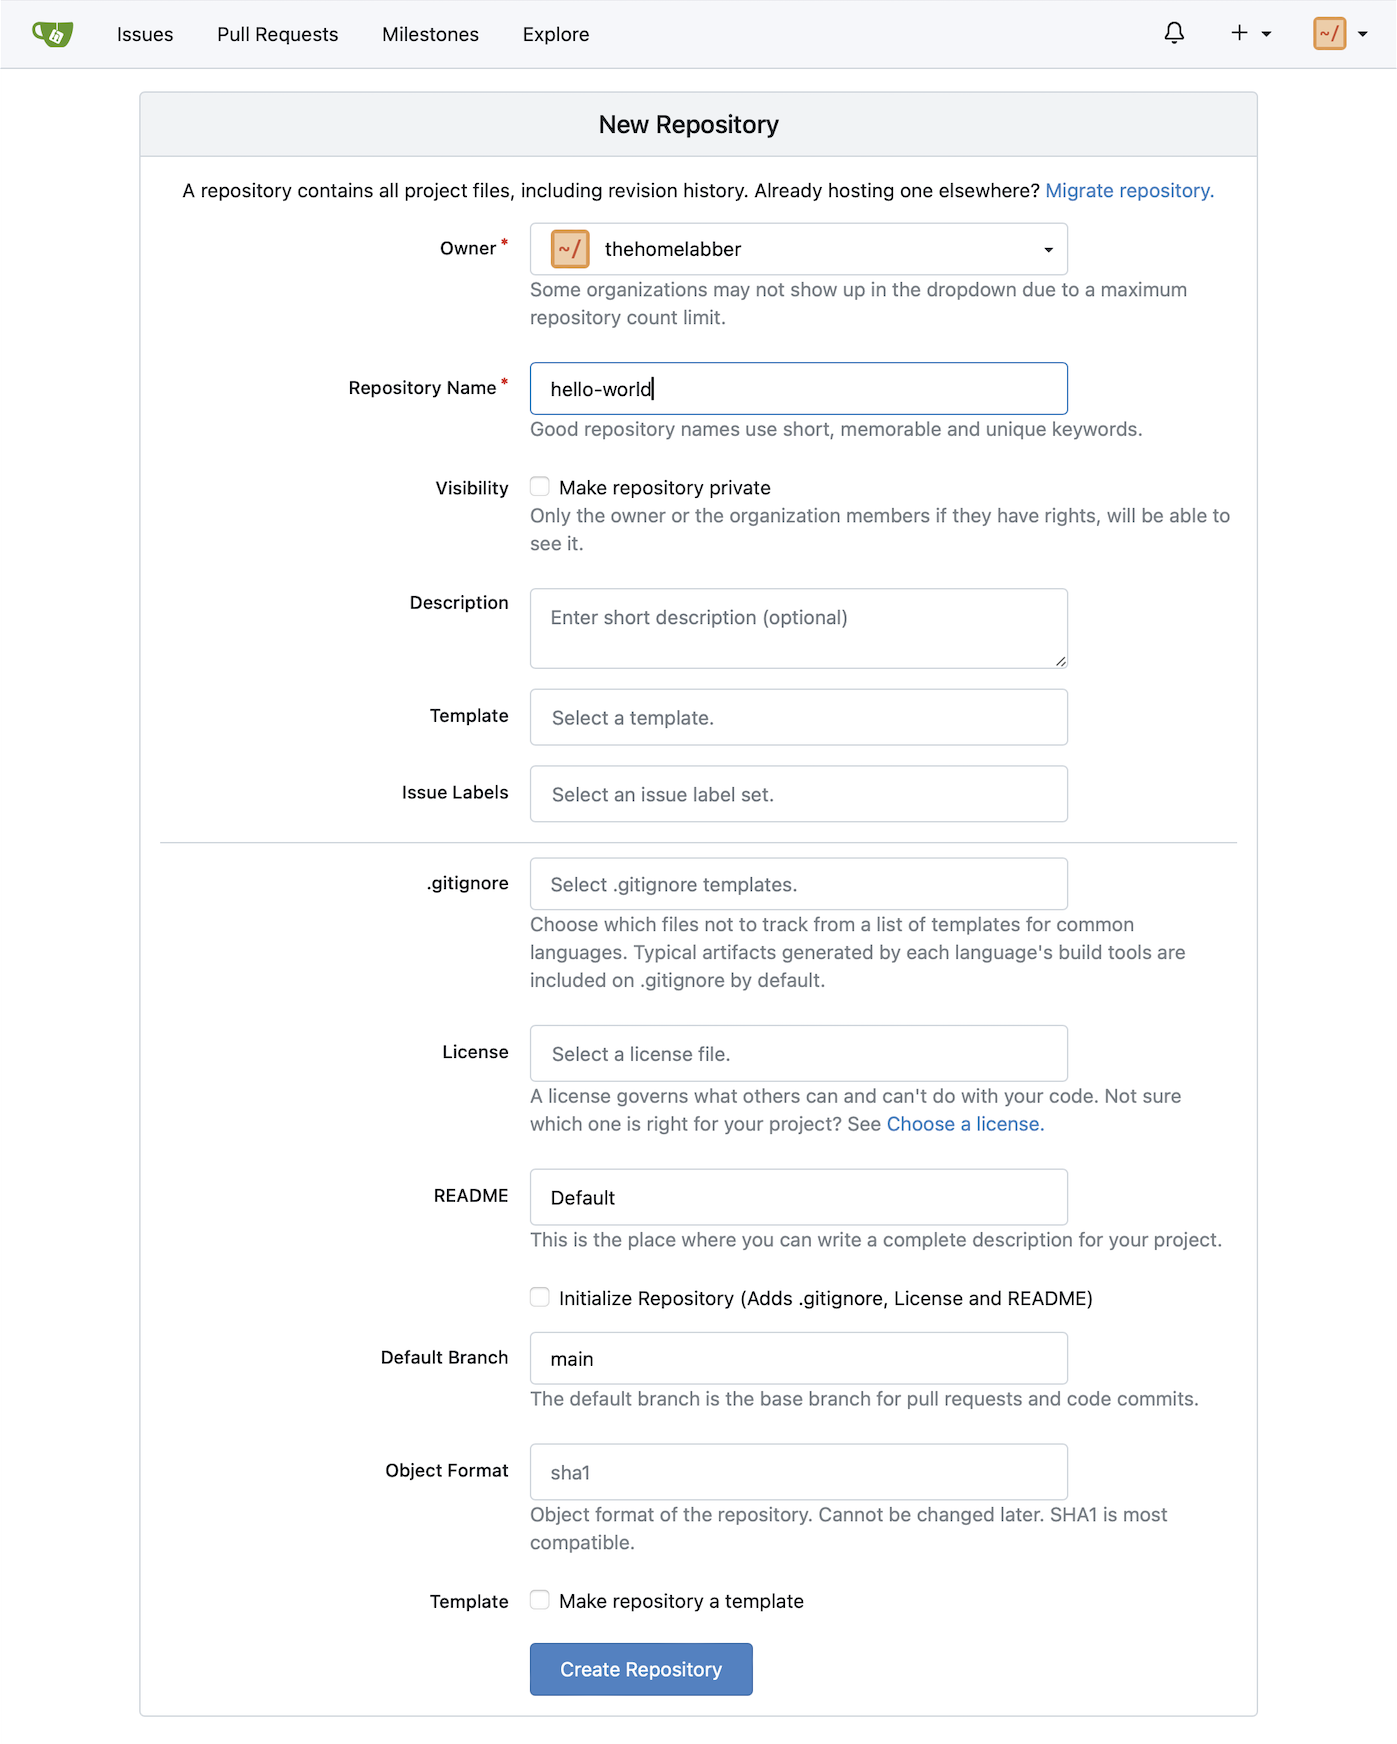
The remaining fields can stay at their default values.
Go ahead and clone the example repository, update the remote origin to use your instance, and push up the code:
# Clone locally
git clone [email protected]:TheHomelabber/self-hosted-git-hello-world.git -o hello-world
cd hello-world

# Remove the existing remote origin
git remote remove [email protected]:TheHomelabber/self-hosted-git-hello-world.git

# Add the new origin, replacing the url with your instance
git remote add origin [email protected]:thehomelabber/hello-world.git
git push --set-upstream origin main
Conclusion
And just like that you should now have a working, locally hosted, instance of Gitea. I have been using Gitea for about a year like this without any Actions, and it has worked great. For some, this may be all you need, however, in the next part we will set up Gitea Actions.
It is well worth mentioning that Gitea has some great documentation. For example, if there is a specific feature you are looking for, or perhaps you just want to see what Gitea is capable of, I highly recommend reading through it.