
In the first part of this series, we walked through the initial setup of Gitea along with our example “Hello World” repository. If you haven’t already, I would recommend reading that before continuing.
Now that Gitea is running, it is time to talk Actions.
Gitea Actions operate similarly to GitHub Actions, in fact you can use the same syntax and even reuse your existing GitHub Actions in Gitea. There are however, some differences between the two systems, and I recommend having a read through these in the Gitea Docs.
Creating the Runner
Gitea recommend operating their runners in docker. As jobs come in, the runner will spawn new containers for the jobs to run in.
I will be setting up the runner in Unraid using one of the pre-configured templates. However, if you wish to use the container in Docker directly, or with Docker Compose, Gitea has documentation for this here.
Creating a Registration Token
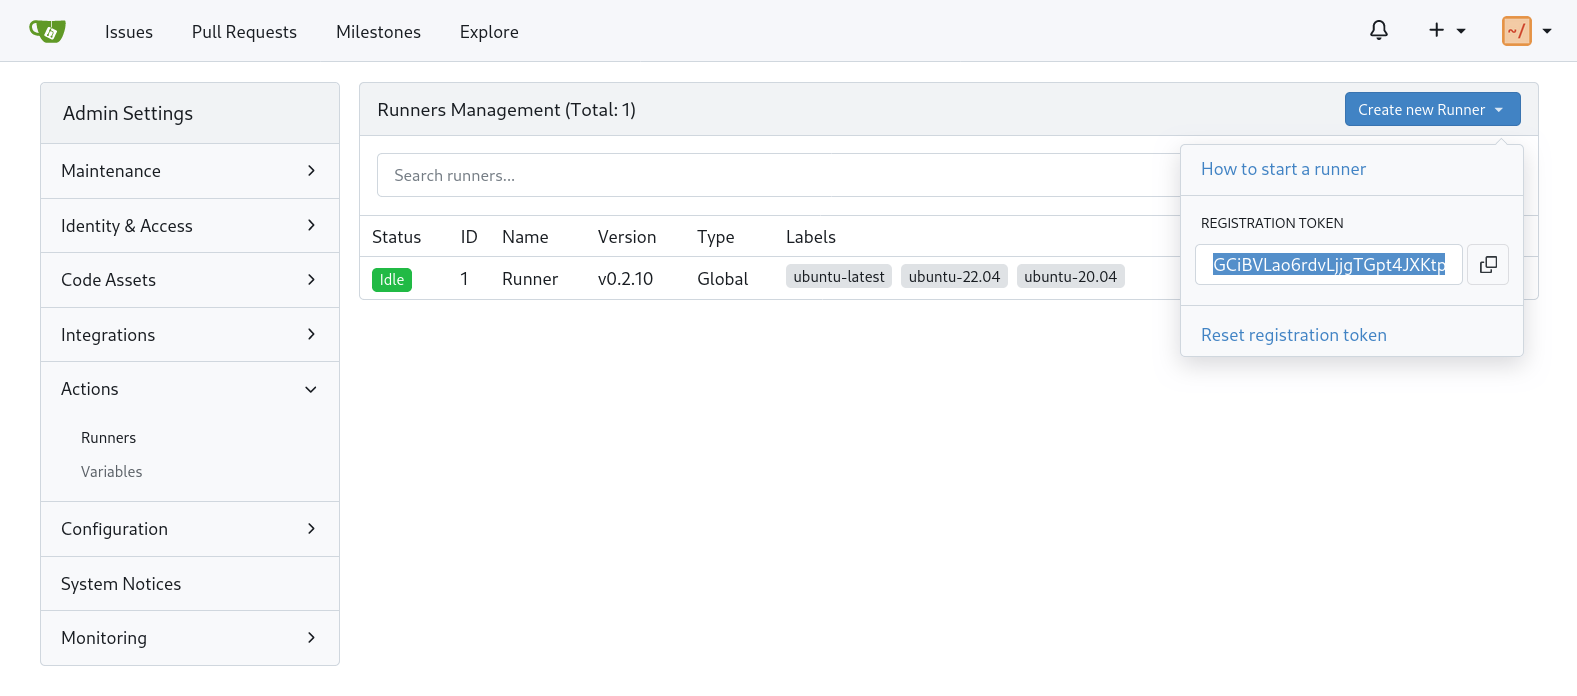
In order to set up a runner, we first need to generate a token used to register the runner.
This is done by going to Site Administration from your user dropdown in the top right corner. Then in the sidebar, Actions > Runners. In the top right is a button “Create New Runner”, click this and copy the registration token.
Installing on Unraid
Before adding the runner, a placeholder configuration file needs to be created. This file will be overwritten by the container in later steps, but we need to create the initial file to mount into the container.
From the Unraid terminal, create the empty file using the following commands:
mkdir /mnt/user/appdata/gitea-runner
touch /mnt/user/appdata/gitea-runner/config.yaml
You can change the name of the directory if desired (I used gitea-homelabber-runner), but gitea-runner is the default.
Now this pre-requisite is complete, search for “Gitea Runner” in the Unraid Apps. I used the template by “homelabber” (no affiliation with thehomelabber.com).
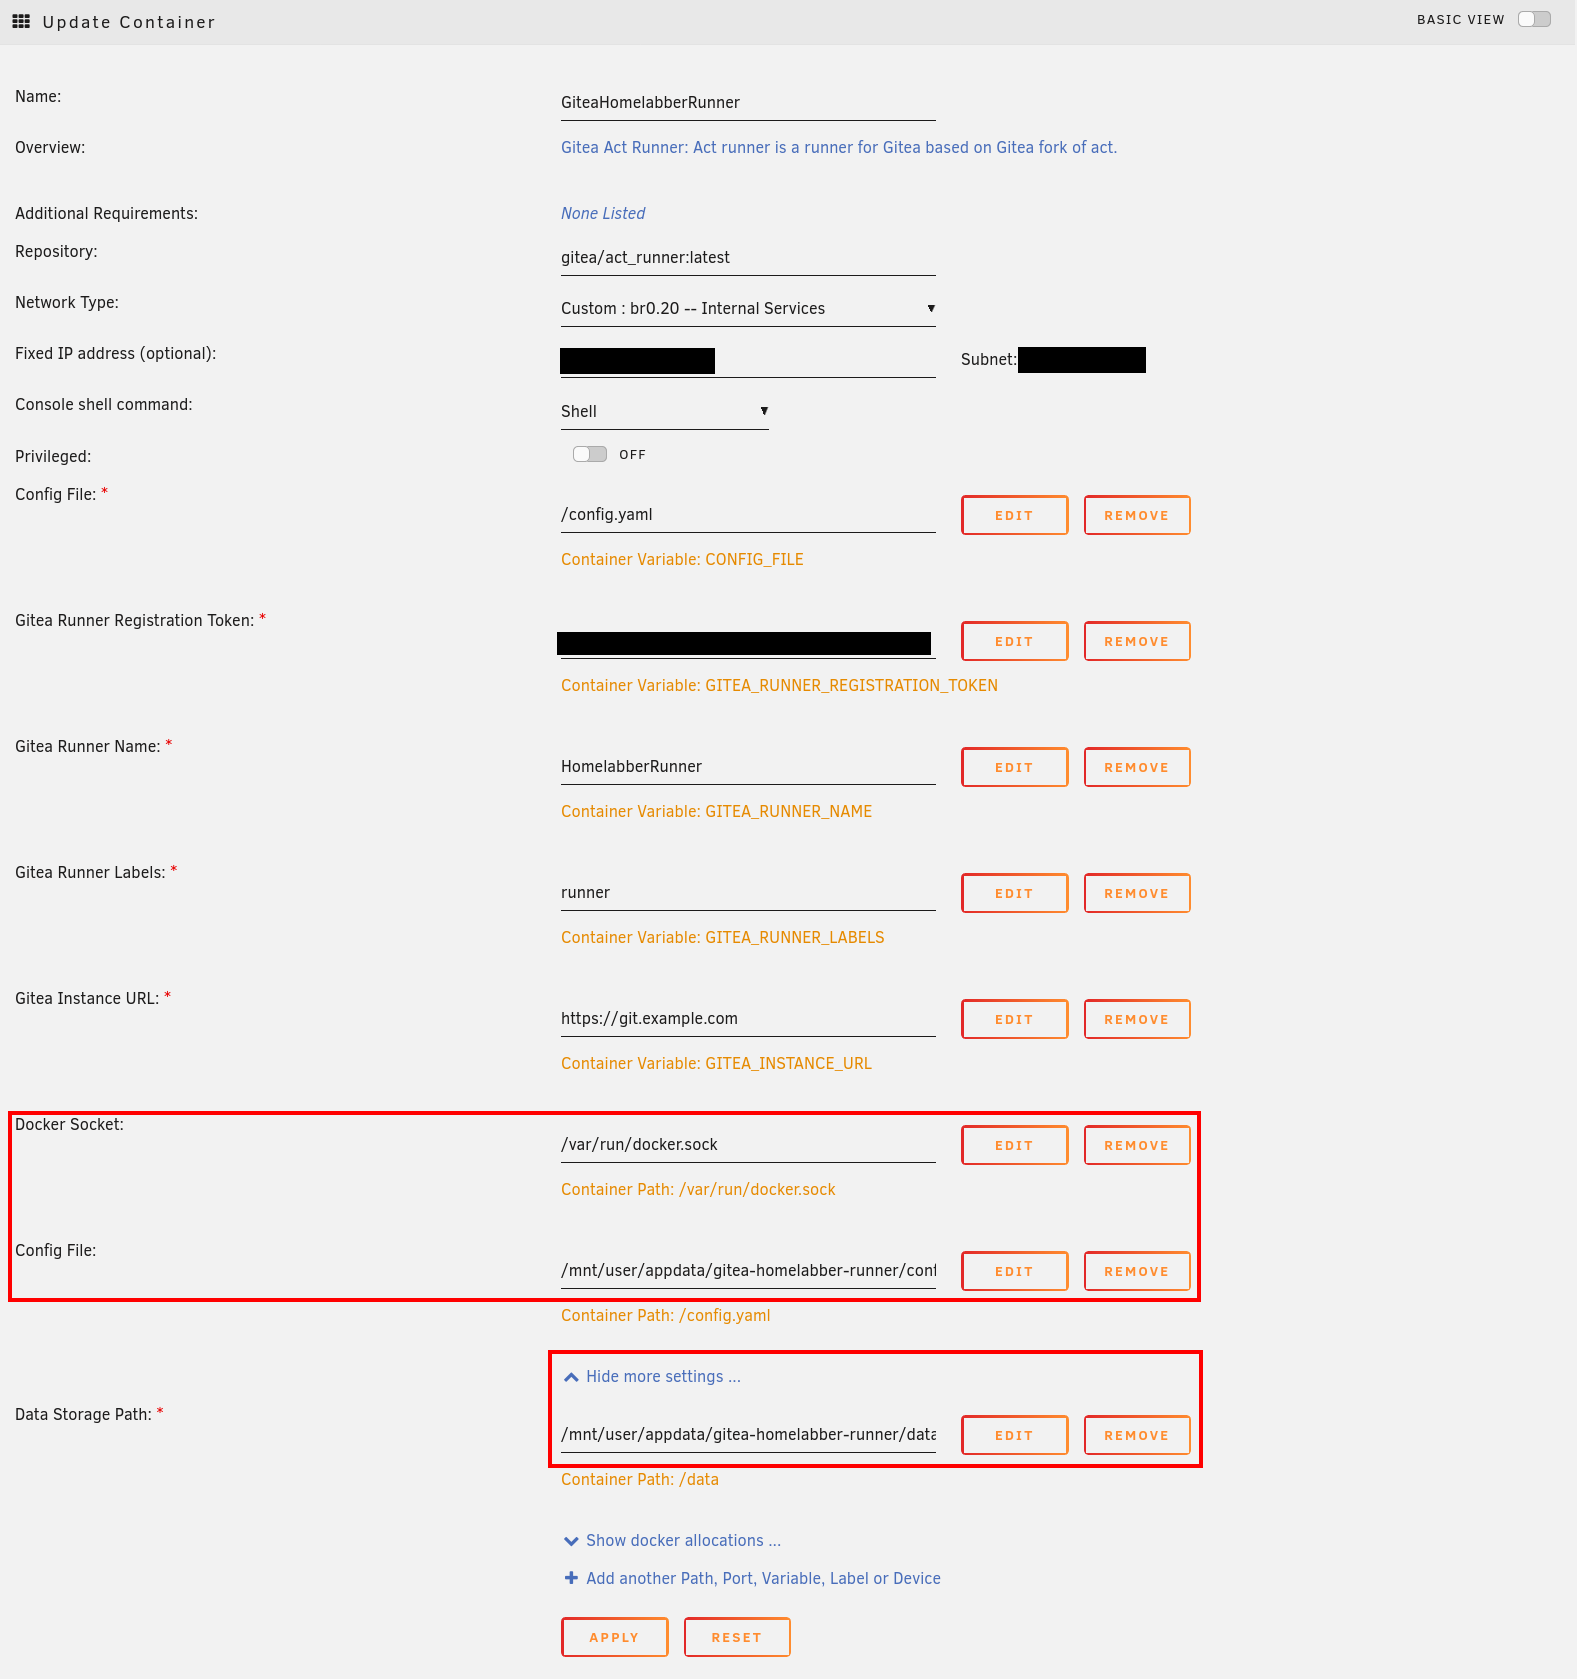
Note: If you also decided to use the template by homelabber, there is some additional configuration required before creating the container.
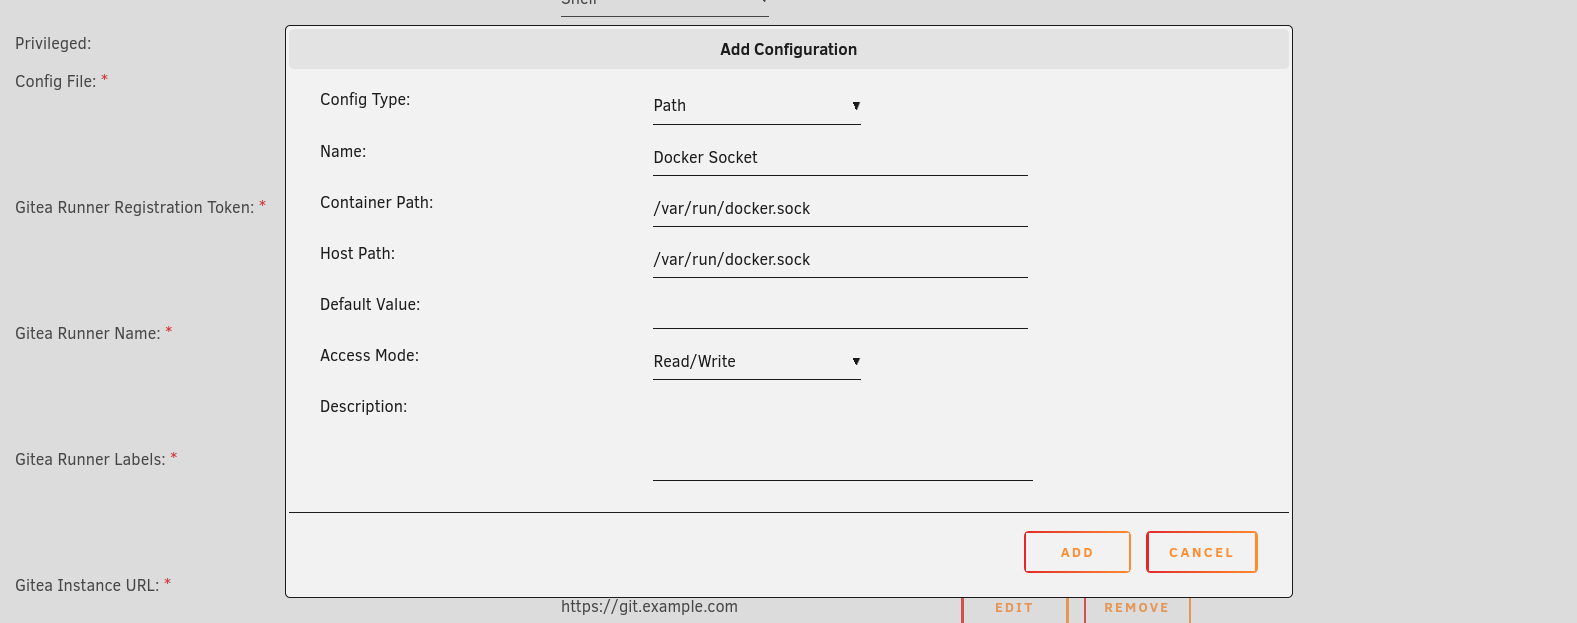
First, add a path for the Docker Socket (used to spin up new containers for the jobs to run), by clicking “+ Add another
Path, Port, Variable, Label or Device”. In the popup, set the config type to “Path” and enter /var/run/docker.sock in
both the “Container Path” and “Host Path”.
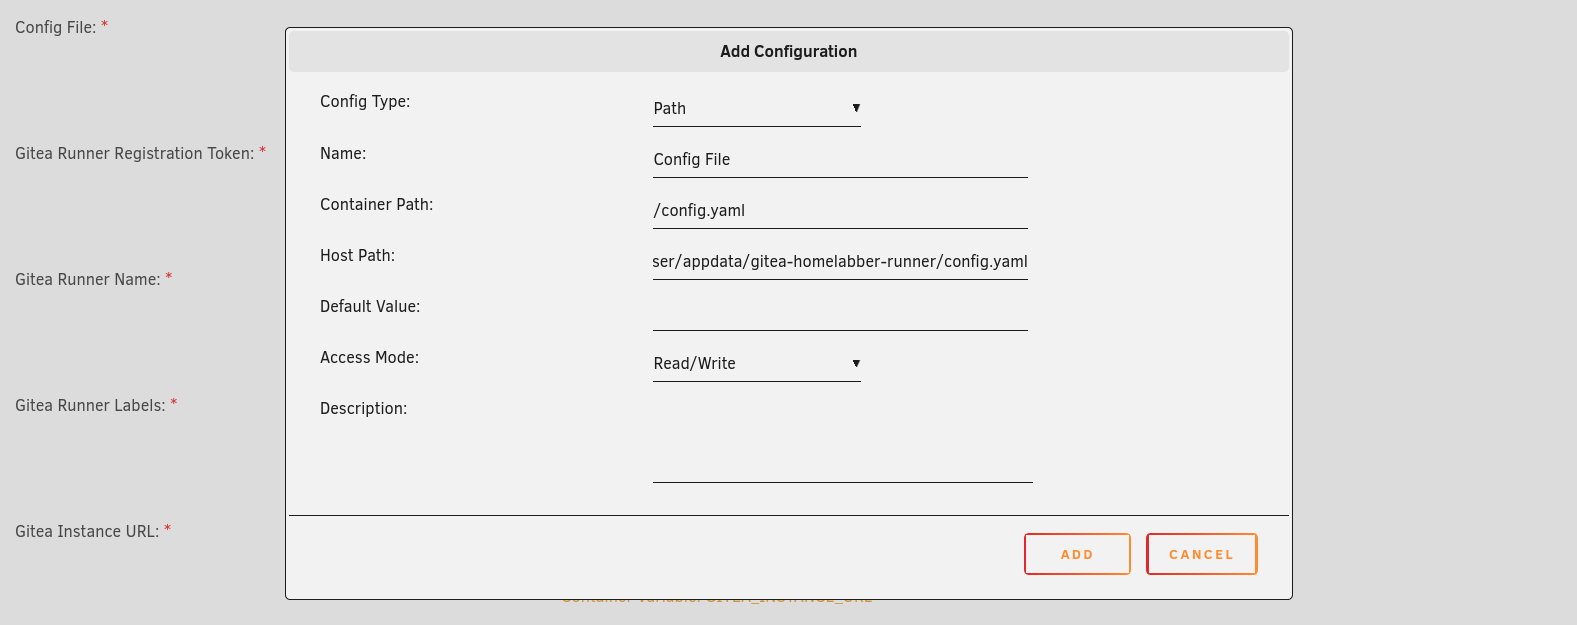
Next, the path to the placeholder configuration file created earlier needs to be added. Once again click “+ Add another
Path, Port, Variable, Label or Device”, set the config type to “Path”, but this time enter /config.yaml in the container
path field. For the host path, enter the configuration files path, /mnt/user/appdata/gitea-runner/config.yaml if you
stuck with the default location.
Now click “Apply” and the runner should be created.
Runner Configuration
Now that the runner’s container has been added, a config file needs to be generated for the runner to work. To do this, run the following command from the container’s console:
act_runner generate-config > config.yaml
This default configuration is ready to go, but I recommend reading through so you know how the runner is configured and what options are available to you.
When checking the containers logs, you should see a success message:
level=debug msg="Successfully pinged the Gitea instance server"
level=info msg="Runner registered successfully."
SUCCESS
Finally, if you go back to the Gitea instance you should see the runner in Site Configuration > Actions > Runners.
You now have a working runner!
Using Actions with Workflows
Enabling Actions for the Repository
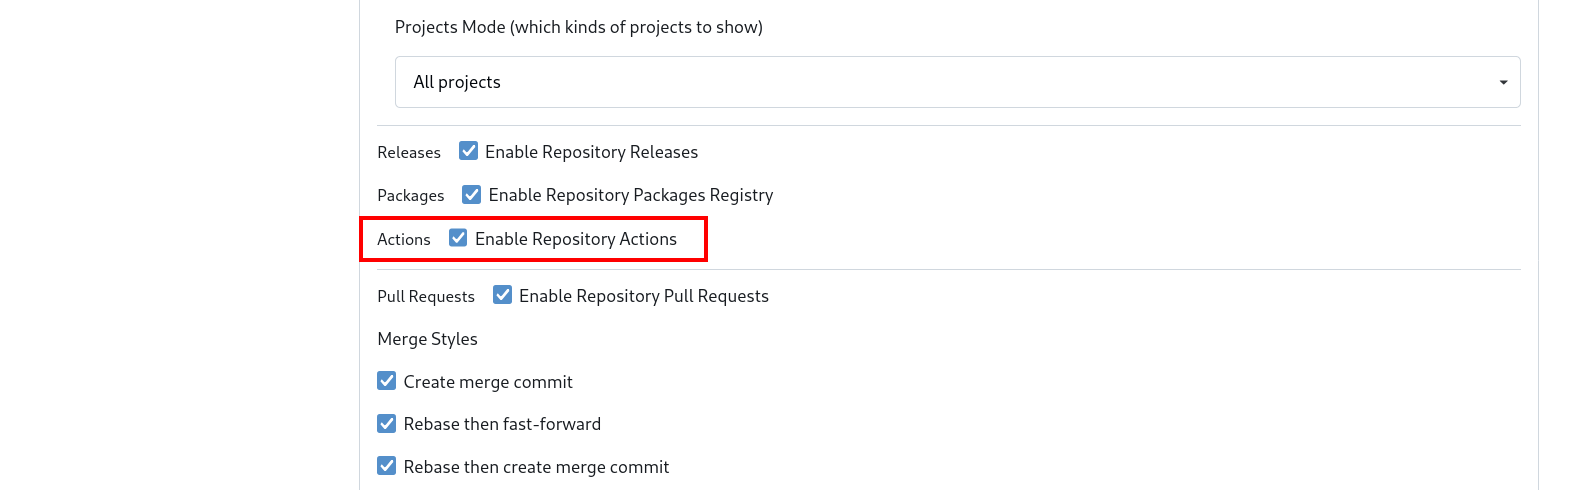
By default, Gitea disables Actions for repositories. So before creating any actions, they need to be enabled in the repositories settings. Go to the “hello-world” repository created in part 1 and click “Settings” in the top right. About halfway down the page is the “Enable Repository Actions” checkbox.
Workflows
For those of you following along without the repository created in part 1, you can see the directories and file discussed in this section here.
In the “hello-world” repository, you will find a hidden directory .gitea.
If you have previously used GitHub actions, you will be familiar with the .github directory. In this directory is
another called workflows which contains a checks.yaml file, this is a workflow.
Workflows are the configuration of automated processes, usually made up from one or more jobs in a YAML file. If you are unfamiliar with workflows, you can read more about them and their syntax here.
name: Go Checks
run-name: Go Checks
on: [push]

jobs:
  checks:
    name: checks
    runs-on: ubuntu-latest
    steps:
      - uses: actions/checkout@v4
      - name: Setup Go
        uses: actions/setup-go@v5
        with:
          go-version-file: 'go.mod'
          check-latest: true
          cache: true

      - name: Install govulncheck
        run: go install golang.org/x/vuln/cmd/govulncheck@latest

      - name: Go Tidy
        run: go mod tidy && git diff --exit-code
      - name: Go Mod
        run: go mod download
      - name: Go Mod Verify
        run: go mod verify

      - name: golangci-lint
        uses: golangci/golangci-lint-action@v6

      - name: Run govulncheck
        run: govulncheck -test ./...
This workflow is straight forward. It has a single job called “checks”, which will run whenever changes are pushed up to the repository.
This job:
- Sets up a Go environment, using the same version of Go as defined in
go.mod. - Installs govulncheck to check for any known vulnerabilities in the dependencies used.
- Runs Go tidy to check for any syntactical problems.
- Downloads Go modules (dependencies) and verifies.
- Runs golangci-lint to lint the code, identifying any bad practices and possible vulnerabilities.
- Finally, runs govulncheck installed earlier.
While the example is for a Go project, you can imagine how it may be similar for other languages. Take for instance Javascript - The Node environment would be setup, npm would install the dependencies, and perhaps a linter would be run.
Running the Workflow
From the root of the “hello-world” repository, create an empty commit to push, triggering the action:
git commit --allow-empty -m "Trigger action"
git push
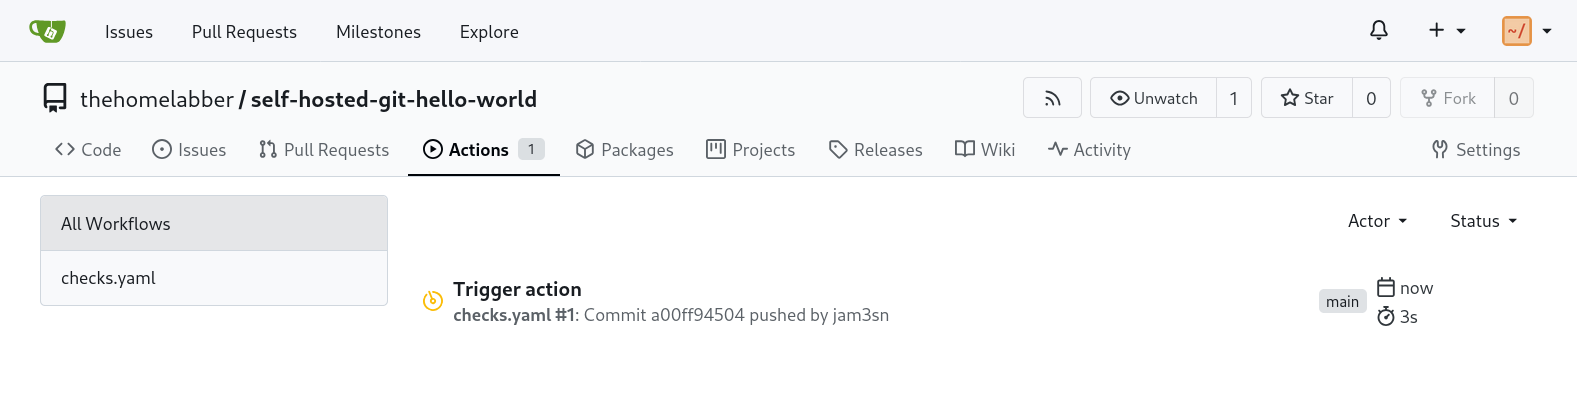
Now from the repository in Gitea, click the “Actions” link and you should see the action running.
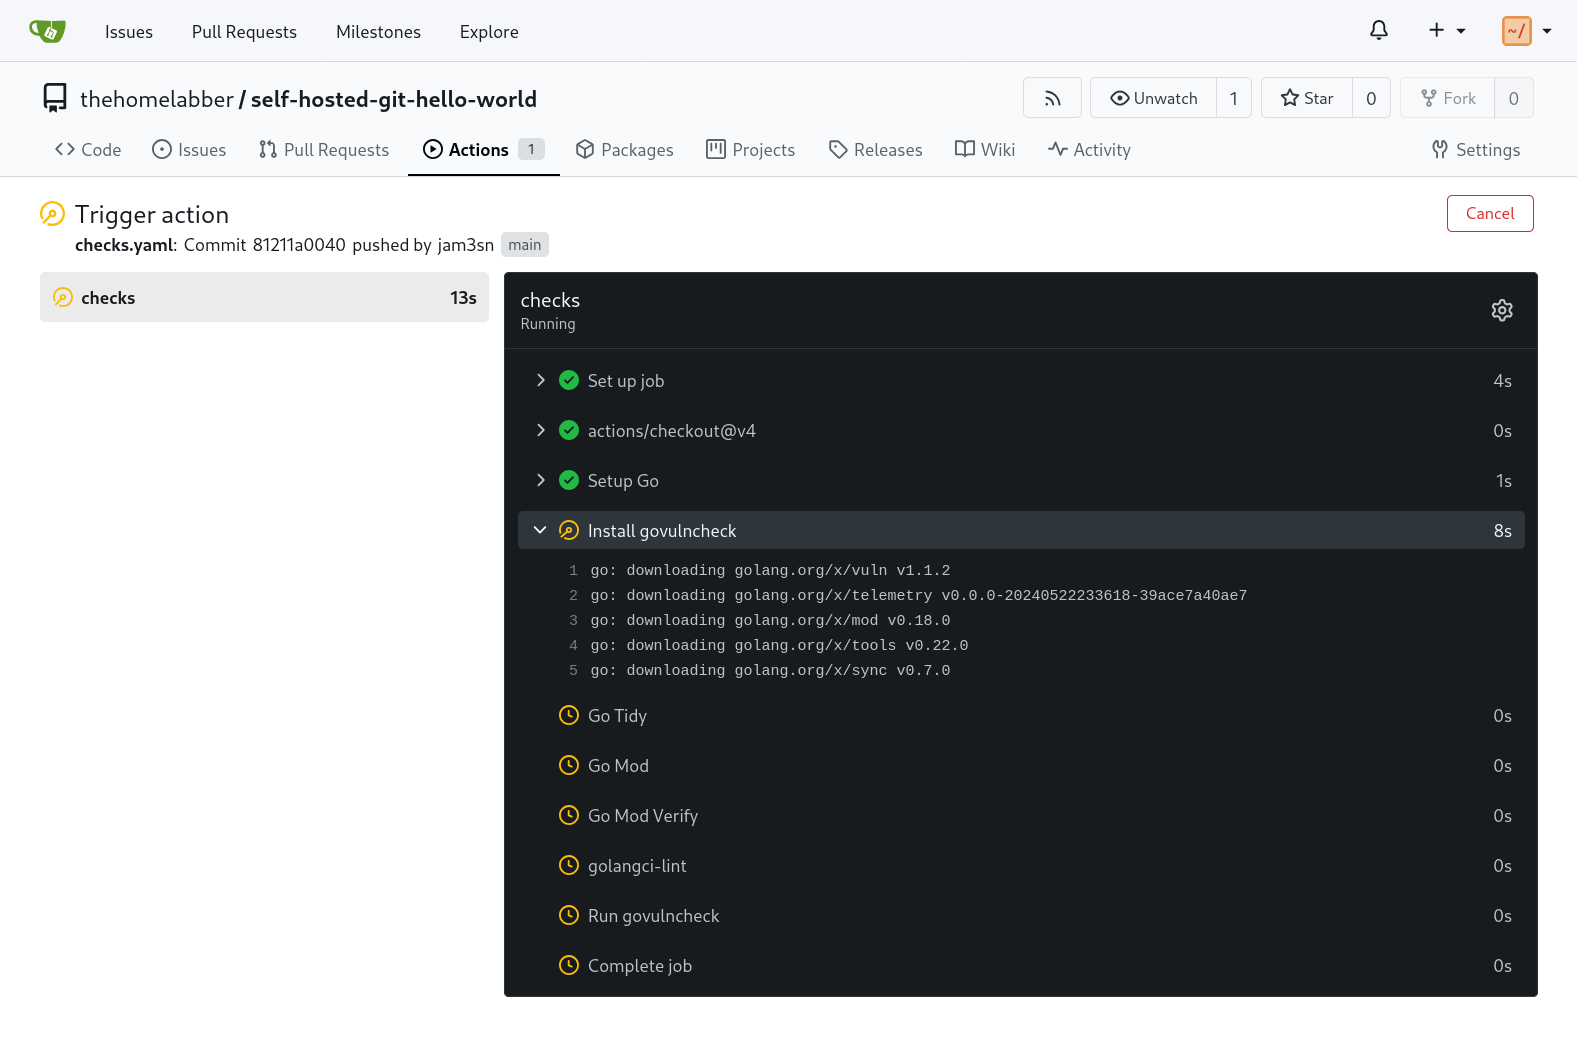
Click the action to see its progress. You can dig deeper by clicking on a job within the action to see its output. This is especially helpful when a job fails, allowing you see exactly what happened.
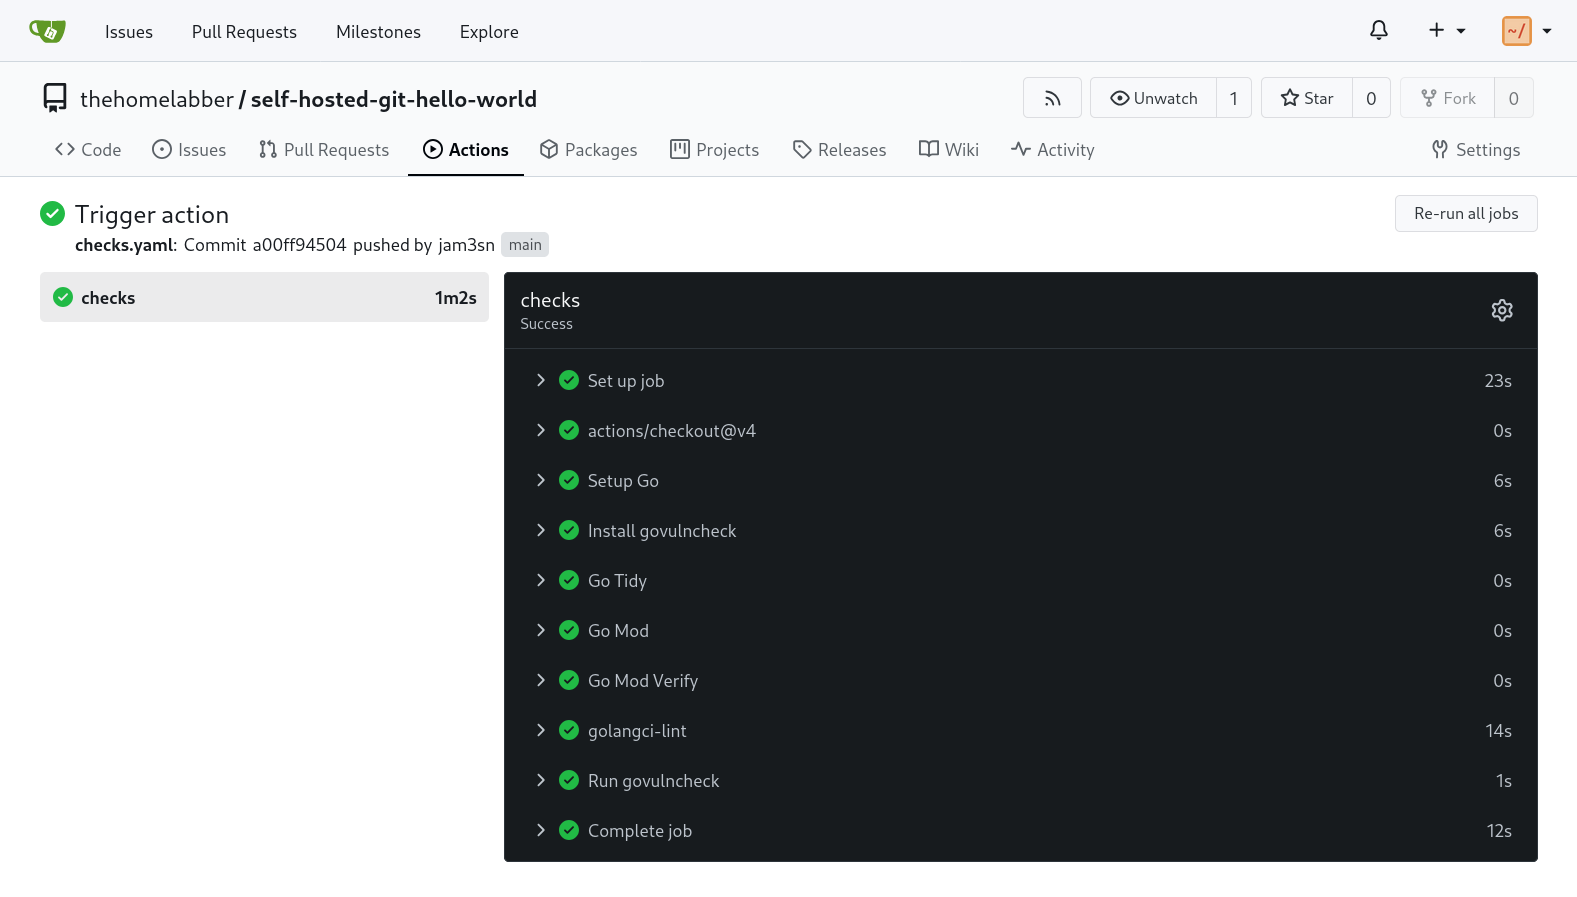
The action should complete in around a minute.
If you find a job is hanging for long time, there may be an issue with caching. To confirm this, click on the job to see its output. There should be a line similar to the following:
::warning::Failed to restore: getCacheEntry failed: connect ETIMEDOUT 192.167.1.20:36833
Cache not found for input keys:
Depending on your network setup, you will need to update the config.yaml, setting the host and port in the cache section.
cache:
  # Enable cache server to use actions/cache.
  enabled: true
  # The directory to store the cache data.
  # If it's empty, the cache data will be stored in $HOME/.cache/actcache.
  dir: ""
  # The host of the cache server.
  # It's not for the address to listen, but the address to connect from job containers.
  # So 0.0.0.0 is a bad choice, leave it empty to detect automatically.
  host: "192.168.1.20"
  # The port of the cache server.
  # 0 means to use a random available port.
  port: 0
  # The external cache server URL. Valid only when enabled is true.
  # If it's specified, act_runner will use this URL as the ACTIONS_CACHE_URL rather than start a server by itself.
  # The URL should generally end with "/".
  external_server: ""
If you have a slightly more complicated network, or are unable to get this to work, you can disable the cache altogether. This is what I ultimately did and found the performance to still be more than adequate.
cache:
  # Enable cache server to use actions/cache.
  enabled: false
Restart the runner and Gitea, then click the “Re-run all jobs” button, or make a new commit and push to trigger the action again. This time it should be much faster.
Conclusion
Actions are a powerful tool in Gitea and GitHub. If you are a developer, sysadmin, or devops engineer you likely already use them, even if you haven’t built a workflow or directly interacted with them. They allow you to check code quality, run tests, and even build containers and binaries, a topic we will be visiting in the next part.
Until then, I encourage you to experiment with your own workflows. Perhaps you have a personal site, or a small project you can try adding Actions to.