
I’ve recently been taking advantage of the onboard 2.5Gb NICs on my PC and Unraid server to enable faster transfers between the two machines. However, I didn’t invest in a pricey 2.5Gb or higher switch to link them. Instead, I connected the two machines directly excluding my network. It was surprisingly simple to do, but does come with some caveats.
Prerequisites
You’re going to need to connect the two machines directly to one another, but also an additional network port on both the server and your computer if you want to remain connected to your network.

I overcame this with a USB ethernet adapter for my PC, being a mini ITX motherboard, I had no room for an additional network card. However, my Unraid server already had a 4 port Intel network card installed which bonds and balances my network traffic.
You can find either USB adapters or network cards fairly cheap online and may even want to consider 2.5Gb or 10Gb cards for the static link.
Configuring Unraid
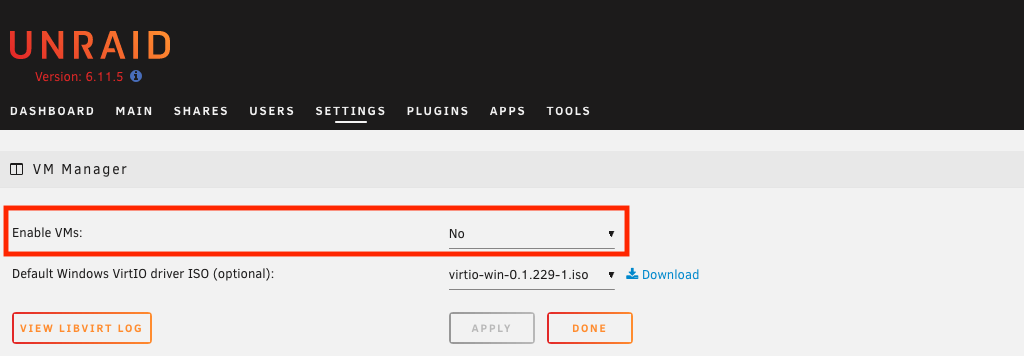
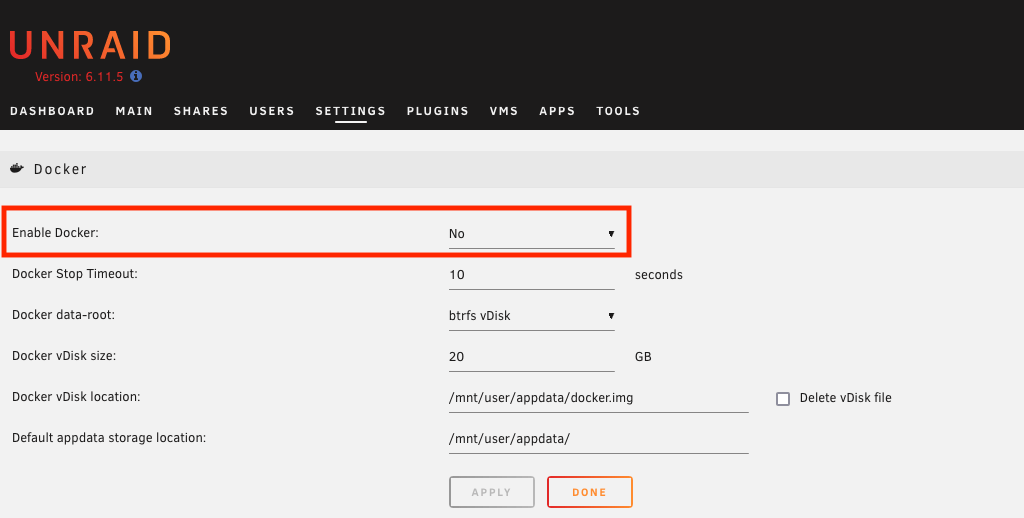
Before we can make any changes to our networking in Unraid, we’ll need to disable the VM manager and Docker service from their respective page in the settings.
Now we can head over to the network settings page and scroll down to the interface we want to use for our static link. In my case it’s Interface eth4.
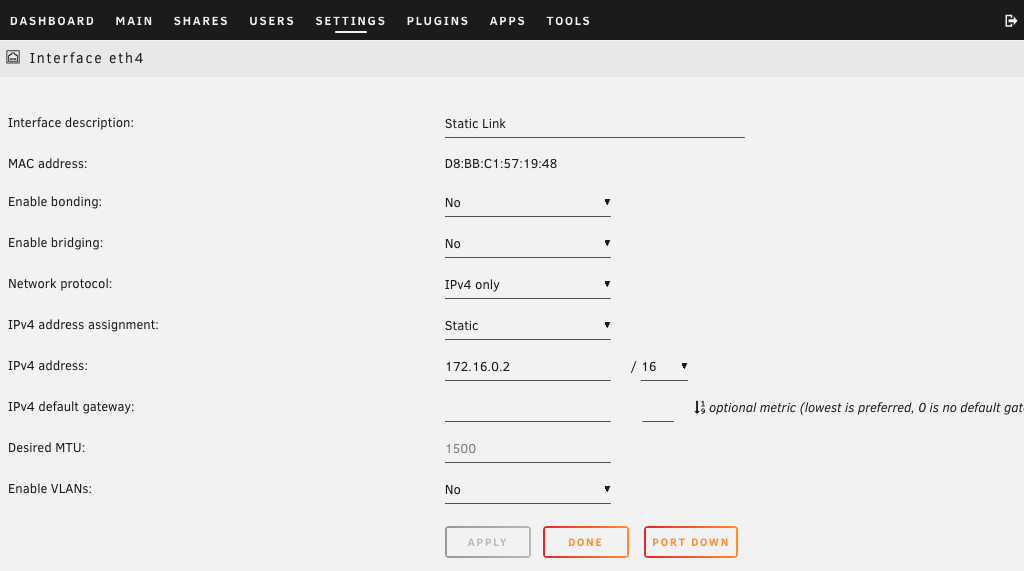
Add a description like Static Link to easily identify it in the future. Next, we can set “Enable bonding” and “Enable bridging” to “No”, and leave “Network protocol” to “IPv4 Only”.
Now we want to change “IPv4 address assignment” to “static” so we can set a static IP for the Unraid server in the following field “IPv4 address”.
For the “IPv4 address” I’ve chosen to use 172.16.0.2 as it’s in a different IP range from the rest of my network, making it easier to identify. Feel free to use a different IP address, but you should adhere to [private network address ranges].
We can leave “IPv4 default gateway” blank as there’s no gateway on this network.
“Desired MTU” should be greyed out or left default, and “Enable VLANs” should be set to “No”.
Connecting to the server
Windows
Open up the network settings from the network icon in the taskbar and toggle open the relevant ethernet tab. From there, click the edit button on “IP Assignment” section.
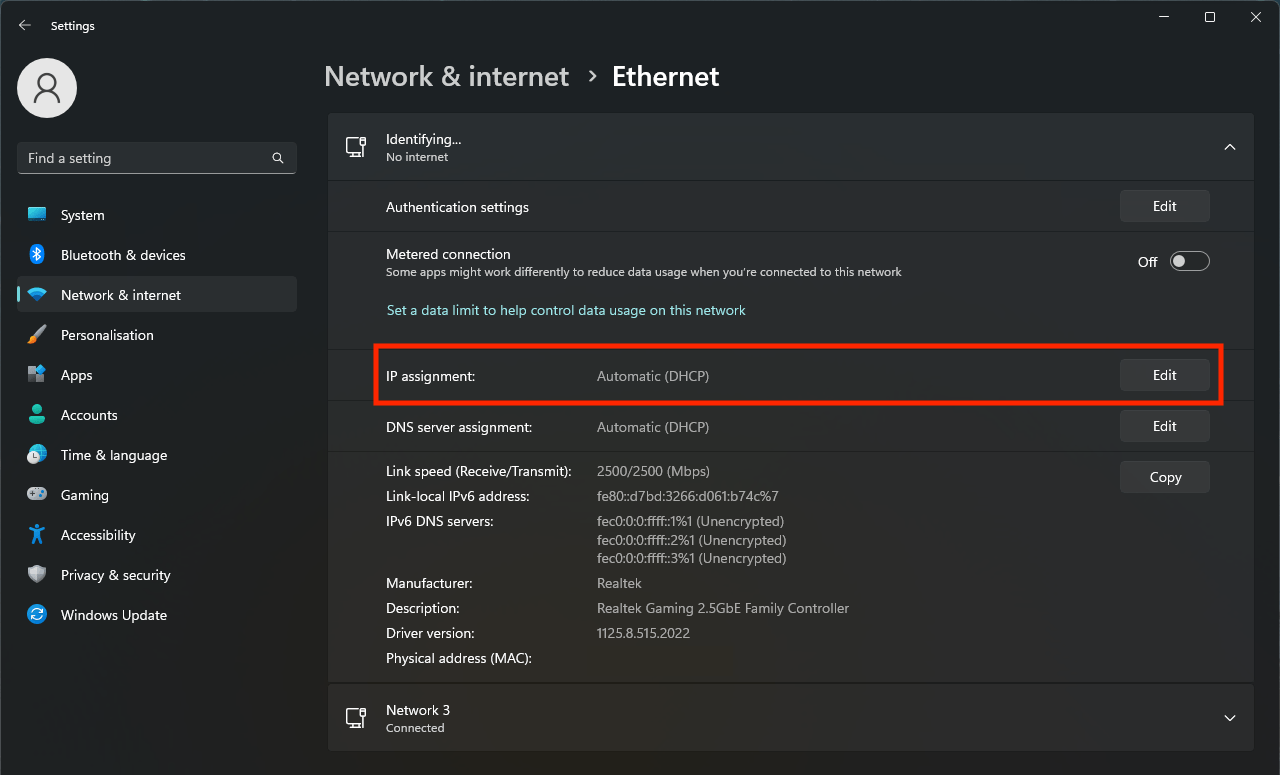
This should open a pop-up window. Click the dropdown containing “Automatic (DHCP)” and change it to “Manual”. We should now see more options.
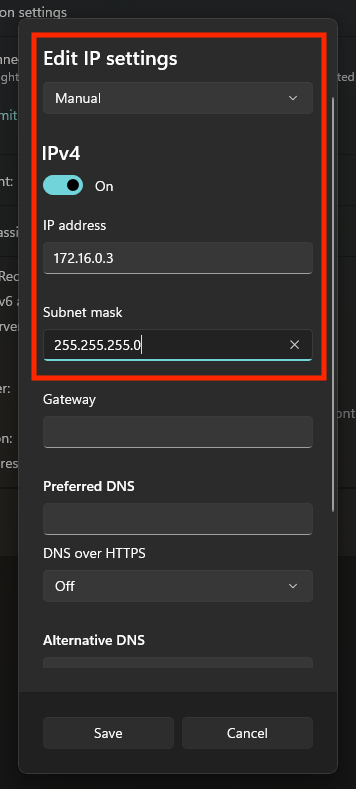
Check the “IPv4” to on. Then enter an IP address in the same range as the one we used on our Unraid server, in my case 172.16.0.3. For the Subnet mask, enter 255.255.255.0.
We can leave the other boxes to their default or empty state and hit save. Now from Windows explorer, we should be able to add shares from our Unraid server, e.g. \\172.16.0.2.
macOS
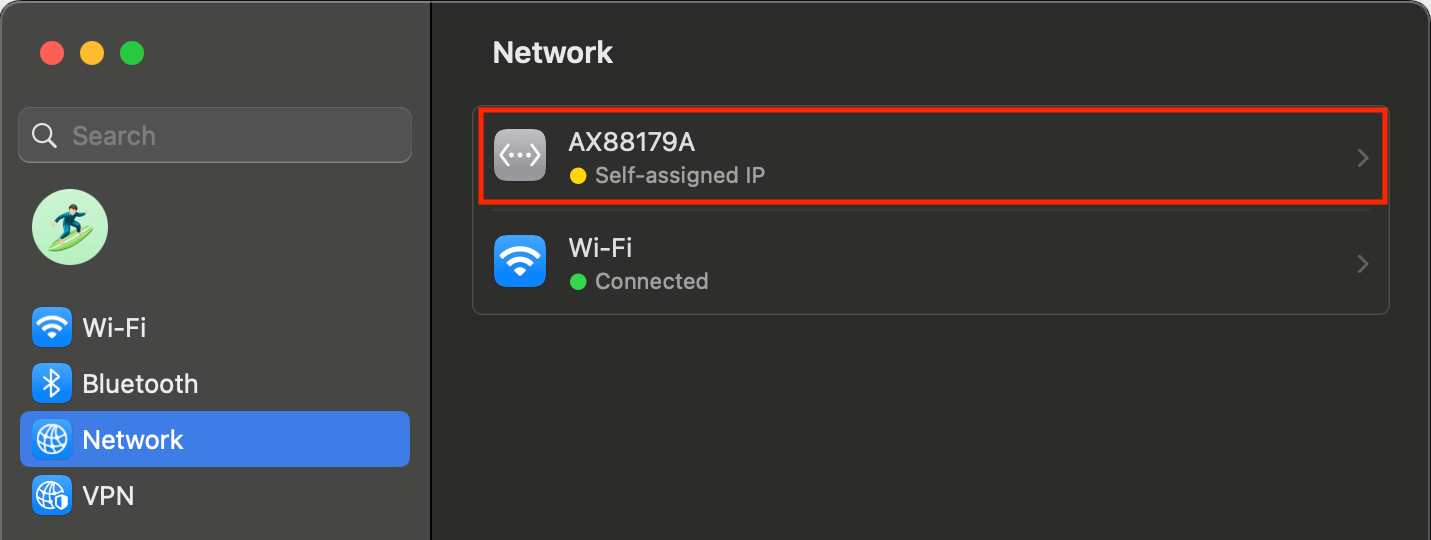
Open up system settings and go to the network section. Click into the network adapter you’re using and then click “Details”.
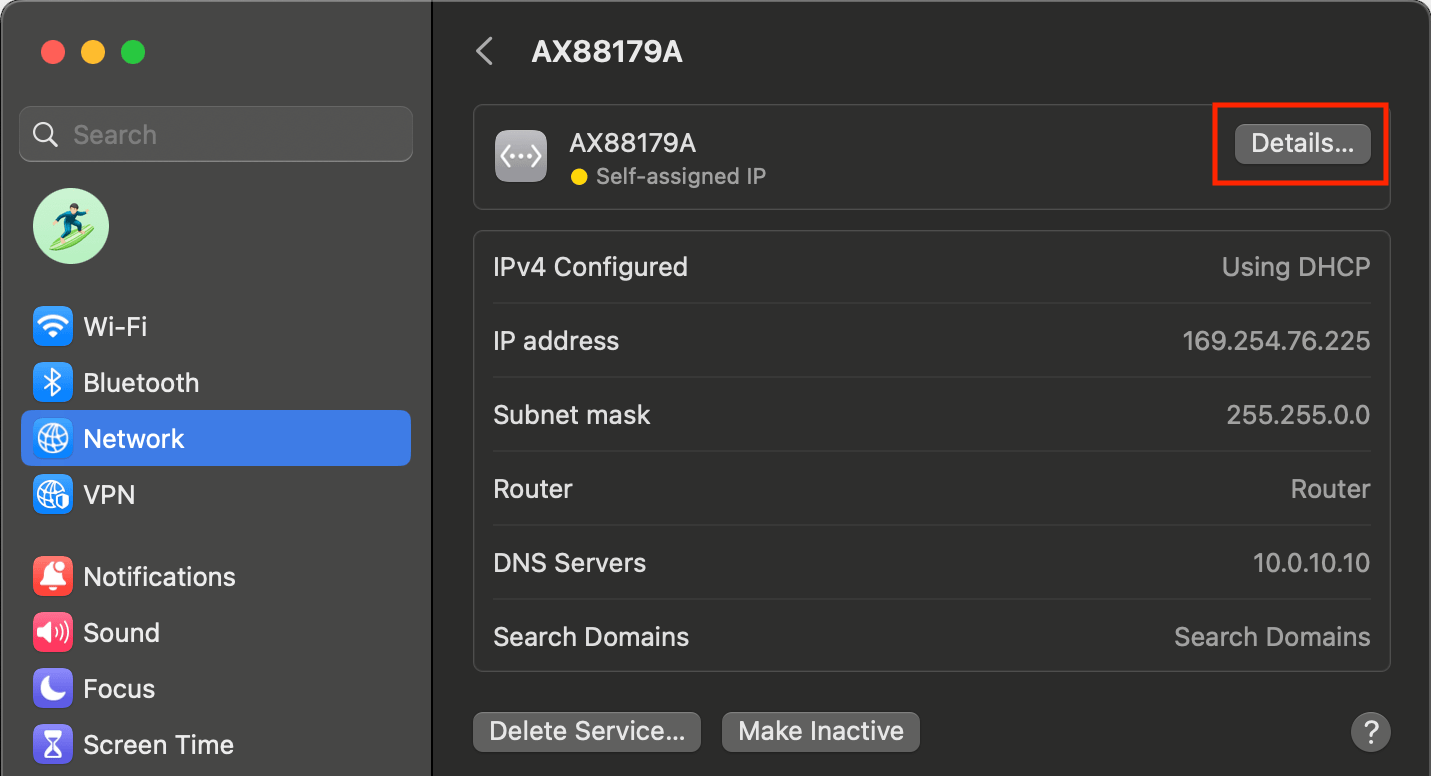
This should pop open a window. From the sidebar menu, select “TCP/IP”.
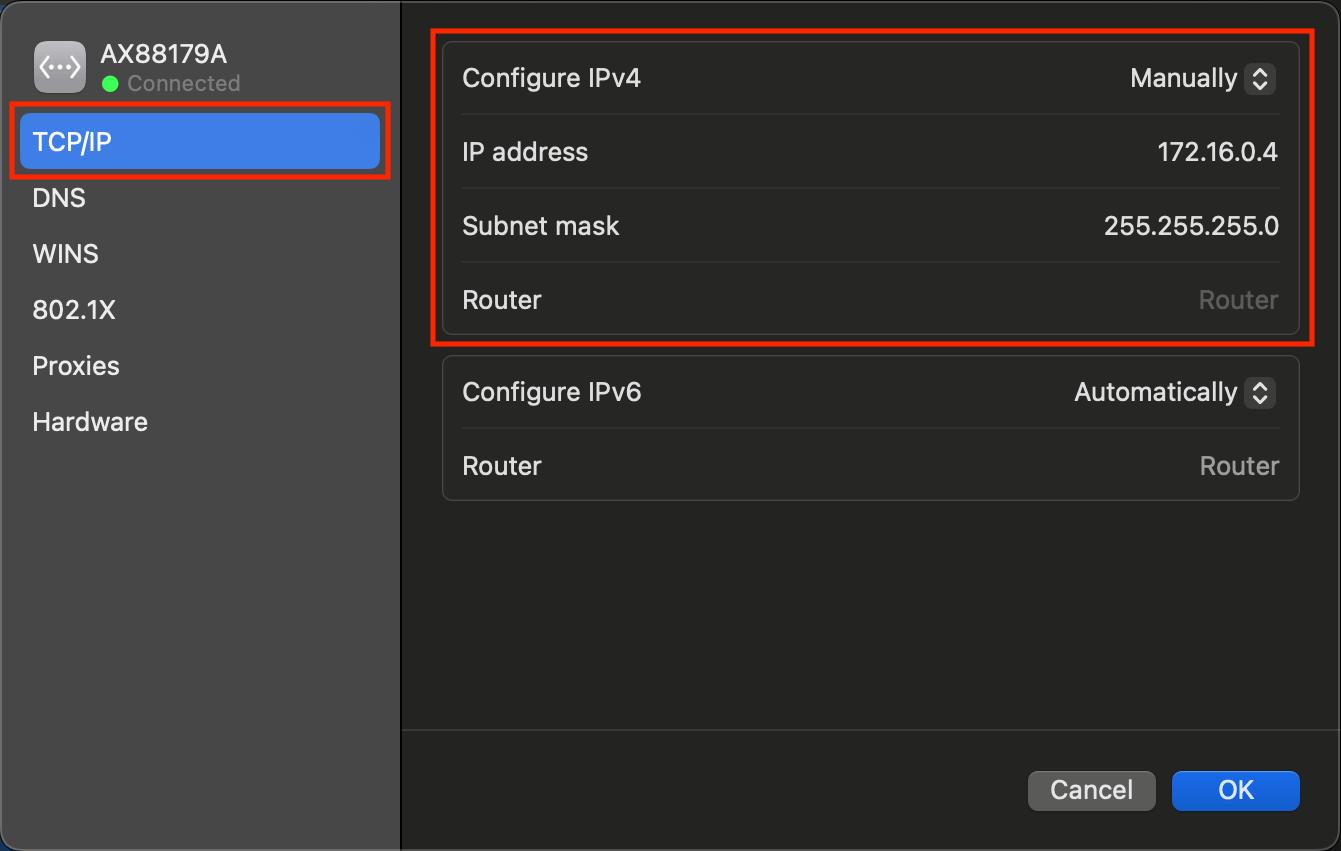
From the dropdown on the “Configure IPv4” row, select “Manually”. Then enter an IP address in the same range as the one we used on our Unraid server, in my case 172.16.0.3. For the Subnet mask, enter 255.255.255.0. We can leave router field and IPv6 settings to the defaults.
We can leave the other boxes to their default or empty state and hit save. Now from Finder, we should be able to add shares from our Unraid server, e.g. smb://172.16.0.2.
Conclusion
A direct link between our Unraid server and computer is a cost-effective way to improve transfer speeds without need for additional hardware like a switch. While I was lucky enough to have an onboard 2.5Gb NIC on both machines, even if you did need to buy additional network cards or adapters, you still save money by not needing a pricey switch.
For me this has been a cheap way to massively improve my transfer speeds. My hard drive shares get around 225MB/s read and 80MB/s write after an initial burst of 280MB/s for a few GB. While SSD shares are about 240MB/s read and 280MB/s write for the entire file.

